Part of my new job is to fully understand the process a maker goes through when developing their ideas into products. There’s no better way to do that than to build something. I believe that to truly learn something you have to struggle through it with your own hands.
For my first “maker experience” project I decided to build a light that represents your Lync status. When Busy it will be red, when Away, yellow and when available it will be green. Yes, it’s very simple, but that’s intentional. I wanted the first project to be more about learning the maker process and not building something complex.
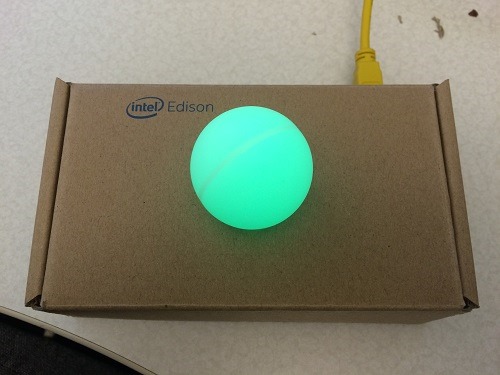
I’m calling this project “beakn” because a beacon is defined as a light set up in a high or prominent position as a warning, signal or celebration. It will be placed on your desk at work or home to let people know when it’s ok or not to disturb you.
The first version will require an app to be running on your Windows machine and a constant USB connection to the beakn. Later versions will be wifi enabled and battery powered so you can place them anywhere without wires.
Let’s first talk about the hardware and build it physically.
The beakn Hardware
Components
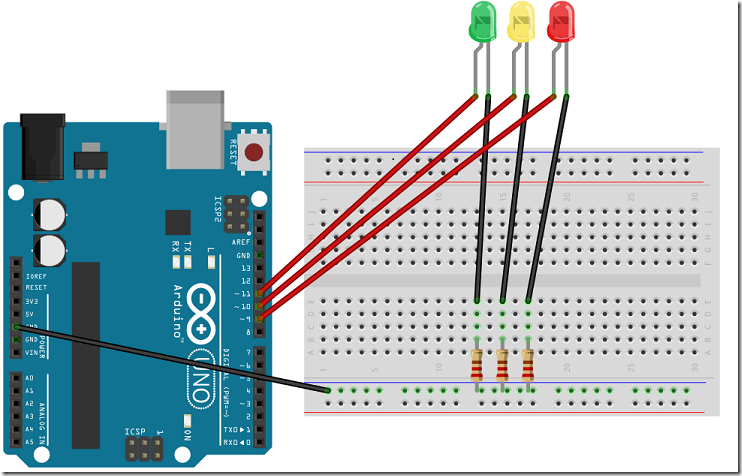
- Arduino – I used an Uno, but any Arduino with 3 outputs and a serial port will work.
- 1 Half-size Breadboard
- 1 USB A to B-Type cable to connect Arduino to computer
- 3 10mm Diffused LEDs. One red, one yellow, one green.
- 3 220ohm, 1/4W Resistors
- 6 Jumper Wires Male/Female – For connecting LEDs to breadboard and Arduino
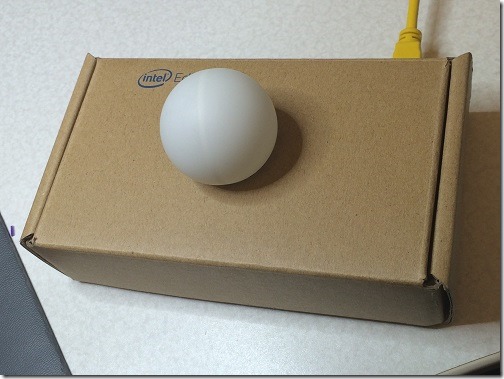
- 1 Ping Pong Ball
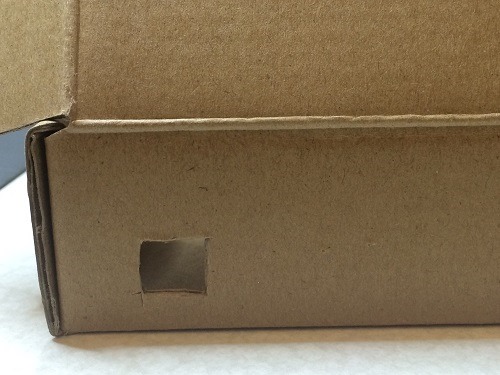
- 1 Box – I used an Intel Edison box that I had, which is 6"L x 3.5"W x 2"H. You can make one out of scrap cardboard if you don’t have one handy.
Tools
- A drill to cut holes in the ping pong ball
- A drill or xacto knife to cut holes in cardboard box
Build Instructions
Step 1
Gather all of the components listed above.
Step 2
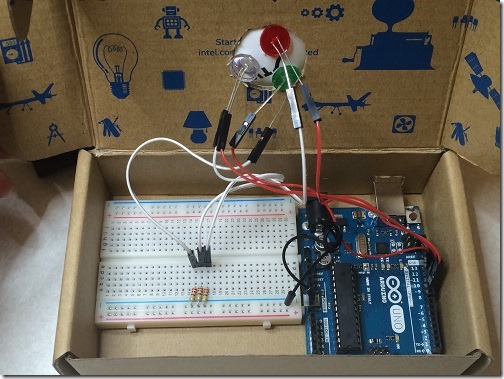
Connect the Arduino, Resistors and 3 LEDs like so:
Ground:
- Arduino Ground to breadboard ground
Anodes:
- Red LED Anode pin to PIN9
- Yellow LED Anode pin to PIN10
- Green LED Anode to PIN11
Cathodes:
- Red LED Cathode pin to 220ohm resistor to GND
- Yellow LED Cathode pin to 220ohm resistor to GND
- Green LED Cathode pin to 220ohm resistor to GND
Step 3
Drill holes into the Ping Pong ball like so. The walls of the ping pong ball are VERY thin and will rip so please make sure you use pilot holes starting from the smallest bit and then move up to a bit that is a little smaller than 10mm.

Step 4
Carve holes in box.
- Carve a 1 inch hold in middle of top of box for the ping pong ball
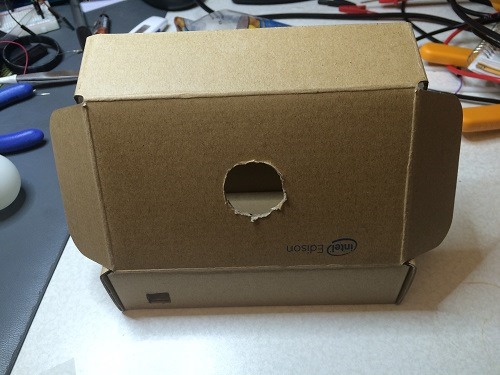
- Carve a square .5 inch hole in the back of the box for the USB cable.
Step 5
Put Arduino, breadboard and lights into box. Stuff the LEDs through the top hole and into the ping pong ball. Stuff the ping pong ball into the hole. The rims of the LEDs will keep it in place.
Step 6
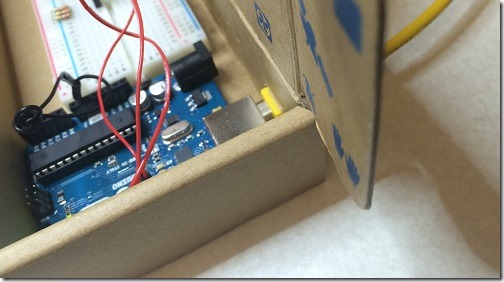
Connect the USB cable and close the box.
 ]
]
 ]
]
That’s all there is to it. We’ll do RGB LEDs, Blinkm and surface mount LEDs in later versions, but what we have so far is a good start.
The beakn Software
This first version of beakn uses serial communication to communicate from your desktop to the Arduino. The two main components of the software are:
Desktop App
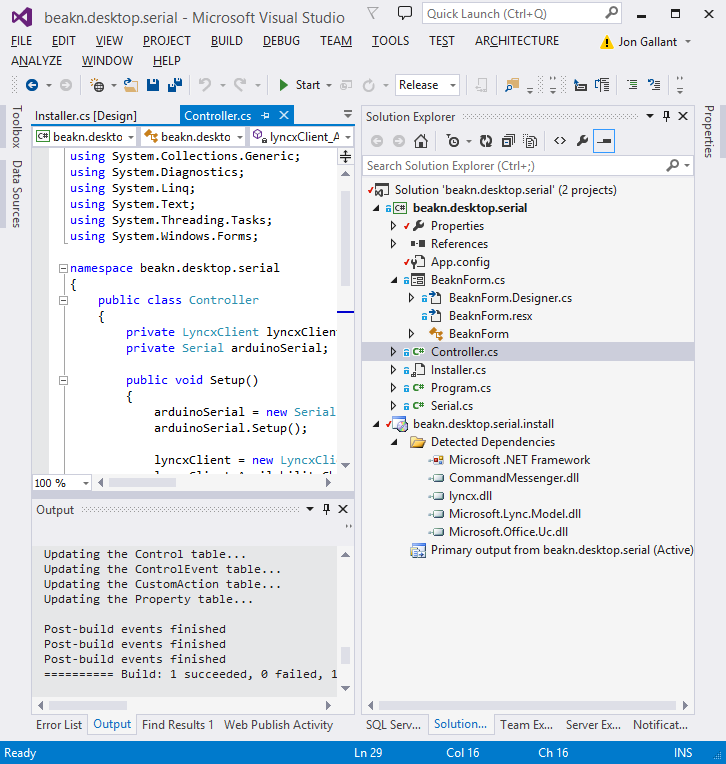
You will need a desktop application that uses the Lync SDK to listen for Lync events and Command Messenger to communicate with the Arduino. This is a Windows Form application that doesn’t have a UI. It’s a form, not a Windows service because it needs to run under the context of the currently logged in user and a Windows Service is machine level.
You can install this app from GitHub here: https://github.com/jongio/beakn/releases/tag/v0.1. Click the beakn-0.1.msi green button and install.
Or you can get the source and build it yourself: https://github.com/jongio/beakn/tree/master/desktop (that is the latest code) if you want to download the code as of v0.1 then use this link and click the “source code” button. https://github.com/jongio/beakn/releases/tag/v0.1
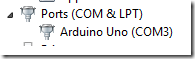
The default COM port is COM3. Check Device Manager to see what COM port your Arduino is on and adjust the beakn.exe.config file to match that.
The meat of the app is in Serial.cs. Serial.cs uses CmdMessenger to initiate and communicate with the Arduino. Controller.cs uses the Lync SDK to handle Lync status change events
I also created a wrapper around the Lync SDK called lyncx, which you can find the source for here: https://github.com/jongio/beakn/blob/master/desktop/lyncx/lyncx/LyncxClient.cs
Arduino Sketch
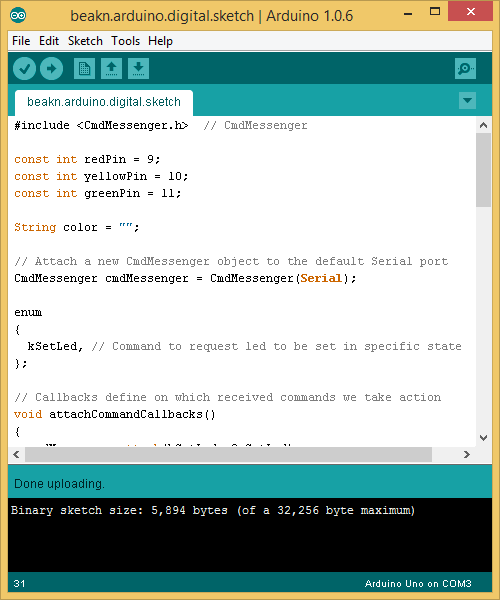
You will need an Arduino sketch to receive the serial command and turn the appropriate LED. You can download the Arduino sketch here: https://github.com/jongio/beakn/tree/master/arduino/beakn.arduino.digital.sketch.
Open it in your Arduino IDE and upload it to your Arduino. You will need to have the CmdMessenger.h file in your Arduino libraries folder (C:\Program Files (x86)\Arduino\libraries\CmdMessenger), which you can get here: https://github.com/thijse/Arduino-CmdMessenger
The “loop” of the sketch listens for serial events and uses the readStringArg method of CmdMessenger to get the current availability status and then calls analogWrite to set the colors of each of the ping. I’m using analogWrite instead of digitialWrite here because I will use an RGB LED in a future version.
Test it out
After you install the desktop app and upload your sketch the ping pong ball should turn the color of your Lync status! Play with changing your Lync status and see if the color changes. I’m hoping it does!
 ]
]
I haven’t fully tested the software side of things – so LMK if you run into any issues at all and I’ll try to help out.
Thanks for following along. Feedback is more than welcome.
The next revision should be done before the end of the week. The next step is getting rid of that breadboard.
Jon