I’ve been using the Adafruit Feather HUZZAH ESP8266 board and Visual Micro quite a bit lately. The Huzzah is a board that includes the ESP8266 WiFi module and a LiPo battery jack – making it really easy to build stand-alone IoT devices. Visual Micro is a VS extension that allows you to code Arduino projects like any other VS project, including debugging.
Here’s the HUZZAH:

Here’s how I configure Visual Micro to code against it:
1. Install VS 2015 – I have enterprise, but community should work.
4. Open VS
5. Configure Visual Micro
You should see the “Configure Ide Locations” dialog popup when you open VS. If you don’t, you can open it by clicking on Configure from the Visual Micro Explorer:

a) Select Arduino 1.6.
b) Enter the path to Arduino.exe, typically c:\program files (x86)\arduino
c) Enter “http://arduino.esp8266.com/stable/package_esp8266com_index.json” into the board manager text box.
6. Click Visual Micro Explorer –> Rescan

You should now see esp8266 in the “Board Package Installer –> All” tree.

7. Click on esp8266 –> 2.3.0 and click OK.

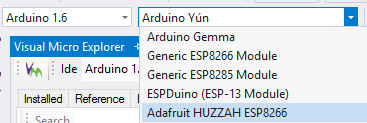
8. Click on “Adafruit” under “Board Package Auto-Discovery”

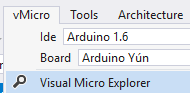
The “Adafruit HUZZAH ESP8266” options should now be available in the Visual Micro board dropdown menu.
9. Plug your board into a USB port.
10. Select the board and the appropriate COM port. Mine is on COM3.

11. Create a new Visual Micro Project called Huzzah blink.

12. Copy and paste this code into the HuzzahBlink.ino file
13. Click the “Build and Upload” button

You should now see the onboard LED blinking.
Jon