Azure REST APIs with Postman (2019)
This content is outdated
Please see the most up-to-date Azure REST APIs with Postman video and blog here:
- Latest Azure REST APIs with Postman Video: https://aka.ms/azurerestvideo
- Latest Azure REST APIs with Postman Blog: https://aka.ms/azurerestblog
This post will show you the fastest way to call the Azure REST APIs using Postman.
We’ll use:
Create Postman Collection
Let’s create a Postman Collection, add a pre-request script, and set some variables.
- In Postman, click the “New” button in the upper left and select “Collection”.
- Give it a name, but don’t click the “Create” button yet.
Pre-Request Script
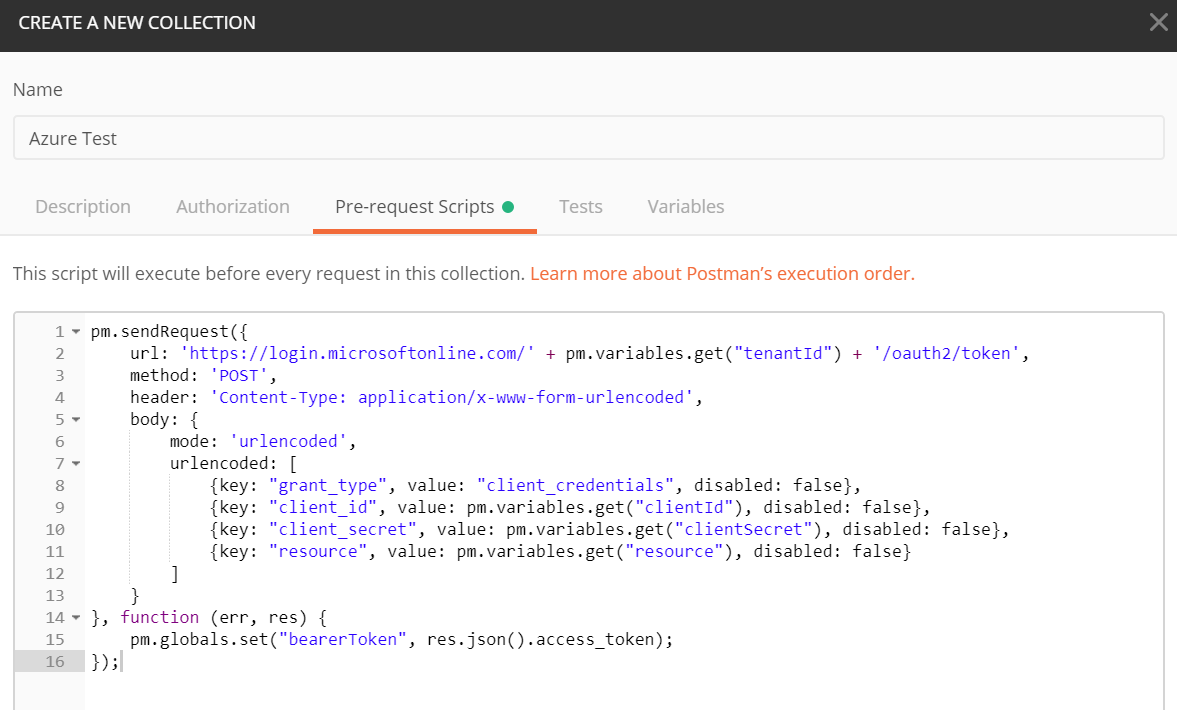
Postman allows you to assign a pre-request script to a collection, which is code that will run before every request. We’ll use that to generate a bearerToken that is required in the Authorization header of each Azure REST API request.
This script will do a POST to login.microsoftonline.com and put the response token in a global variable called bearerToken.
- Copy this code block into your collections pre-request script block.
pm.sendRequest({ url: 'https://login.microsoftonline.com/' + pm.variables.get("tenantId") + '/oauth2/token', method: 'POST', header: 'Content-Type: application/x-www-form-urlencoded', body: { mode: 'urlencoded', urlencoded: [{key: "grant_type", value: "client_credentials", disabled: false}, {key: "client_id", value: pm.variables.get("clientId"), disabled: false}, {key: "client_secret", value: pm.variables.get("clientSecret"), disabled: false}, {key: "resource", value: pm.variables.get("resource"), disabled: false}] }}, function (err, res) { pm.globals.set("bearerToken", res.json().access_token);});
```sql
### Variables
Postman allows you to set variables at the collection level. We’ll put the variables required by the pre-request script and the Azure REST APIs in the “Variables” tab.
1. Create the following variables. We’ll add the variable values in the next section, so keep this form open.
> Make sure you add the variable values to the **CURRENT VALUE** column NOT the Initial Value column.
```bash
clientIdclientSecrettenantIdsubscriptionIdresource: https://management.azure.com/
```sql
Keep the “Create Collection” dialog open and continue to the next step.
## Get Azure Variables
1. Open Azure Cloud Shell - [https://shell.azure.com](https://shell.azure.com)
2. Create a Service Principal
Run the following command to create a service principal - which is a non-user account that can be used to call the Azure REST APIs.
> Make sure you change `sp1` with a unique name.
`az ad sp create-for-rbac -n "sp1" --role Contributor`
1. Copy the outputed variables to Postman Collection variables
```bash
clientId = appIdclientSecret = passwordtenantId = tenant
```sql

1. Get Subscription Id
Run the following command to get your subscription Id.
`az account show --query id -otsv`
1. Copy the outputed Subscription Id to Postman Collection Variables tab
At this point your variables tab should look like this - with every variable filled out.
## Finish Creating Collection
1. Click the ‘Create’ Button on the Postman Collection form.

## Create Postman Request
1. Paste the following URI into the Postman Request URI field
`https://management.azure.com/subscriptions/{{subscriptionId}}/resourcegroups?api-version=2017-05-10`
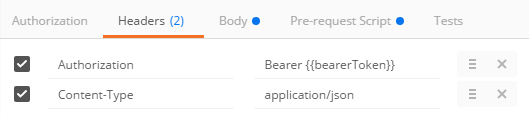
1. Create an `Authorization` header and set value to `Bearer {{bearerToken}}`
2. Save the Request to the Postman Collection you created earlier.
The Postman Collection pane should now look like this:

## Execute Request
1. Click the ‘Send’ Button
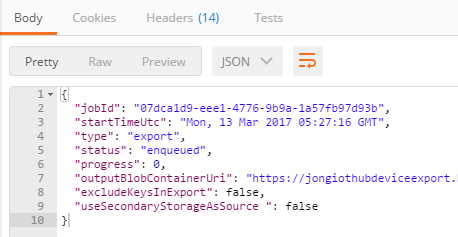
2. Observe Request Output
You will see the REST request output in the bottom pane
```javascript
{ "value": [{ "id": "/subscriptions/f9766876-e50b-436f-9ad3-/resourceGroups/DefaultResourceGroup-EUS", "name": "DefaultResourceGroup-EUS", "location": "eastus", "tags": {}, "properties": { "provisioningState": "Succeeded" } }]}
And that is how to call the Azure REST APIs with Postman in no time flat!
Jon
Share on LinkedIn
Quick Share: Your custom post text has been copied to your clipboard! Click the button below to open LinkedIn's share dialog, then paste it.
💡 Tip: LinkedIn will open in a new tab. Use Ctrl+V (or Cmd+V on Mac) to paste your text.
Note: LinkedIn will show the article preview. You can add your custom text above it.