This post is all about just getting your Photon connected to WiFi with Windows. Particle has some slick iOS and Android apps to help you connect your Photons to Wifi and associate them with your account. But they unfortunately don’t have a Windows Phone version yet. I’ve been working with them a lot lately and doing sessions at the Microsoft Garage. Not surprisingly, a lot of those folks do not have iPhones or Android devices – so they have to use either the Serial or the Node.js particle-cli method to setup their Photons. I normally prefer Node.js, but I found Serial with PuTTY to be easy enough and more familiar to devs that aren’t versed in Node.js and npm.
Install PuTTY
We will be using PuTTY (a Telnet/SSH client) to connect to the Photon to setup WiFi and get the Photon Id.
1. Go to the PuTTY download page and download the putty.exe file. I personally put utilities like this in c:\utils and then add c:\utils to my PATH environment variables. That way I don’t have to edit my PATH every time I download a new utility.
The direct link to the putty file I used is: http://the.earth.li/~sgtatham/putty/latest/x86/putty.exe
Put Photon in Listening Mode
We need to get the Photon in Listening mode (flashing blue) to configure it. (You can learn about the other Photon modes here)
1. Plug Photon into your computer’s USB port.
2. Is your Photon flashing blue? If so, move on to next step. If not, then hold down the Setup button until the LED flashes blue. If you can’t get it to flash blue then hit the Reset key and try again.
Connect to Photon
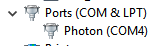
1. Open Device Manager and find your Photon under Ports (COM & LPT). Make note of the COM port it is assigned to. In my case it is COM4.
2. Open PuTTY
a) Select the Serial radio button
b) Enter COM4 (or whatever port your Photon is assign to) into the **Serial line **text box
c) Keep Speed at 9600
d) Click Open

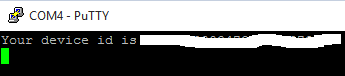
3. You should now see what looks like Command Prompt. This is the Serial monitor session and looks like this:

Get Photon Id
We will need to the Photon Id later when we connect it to your Particle Account.
1. From within the PuTTY session, hit the “i” key on your keyboard – this will print your Photon Id. Copy it over into Notepad. You will need it later.
Setup Photon WiFi
1. From within the PuTTY session, hit the “w” key on your keyboard – this will initiate the WiFi setup process.
2. Enter your SSID
3. Select your Security Type
4. Enter your Password

Your Photon should reboot and will be in Connected mode (Pulsing cyan aka breathing cyan)
At this point you should have:
a) Photon Id in Notepad
b) Photon is connected to WiFi
c) Photon is in Connected Mode (breathing cyan)
If you do not have those three things, then scroll back up and find out what you missed.
Create a Particle Account
Now that your Photon is configured let’s create a Particle account and associate the Photon with your account.
1. Create a new Particle Account here or use one that you already have.
Add Photon to Particle Account
1. Go to Particle Build (the online cloud IDE)
2. Click on the “Devices” icon in the lower left rail. It looks like a target.

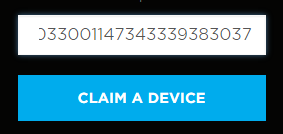
3. Click the “ADD NEW DEVICE” button and copy your Photon Id from Notepad into the box and click the “CLAIM A DEVICE” button.
4. Give the device a name that makes sense to you and click “SAVE”

You will now see the device in your “Other” list

If you want to deploy to the device right away, then click the star to the left of it to set it to the device to flash to (You can flash one at a time through the cloud IDE). Once you do that you’ll see your device in the Photons list like this:

Get Particle Access Token
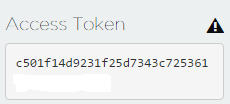
All of the APIs and apps that use your Photon will require an Access Token. You’ll want to copy this over to Notepad so you can use it later.
1. Go to Particle Build (the online cloud IDE)
2. Click on the Settings icon in the lower left rail

3. Copy the Access Token over to Notepad. You will need it later when you call APIs that require it.
Next
That’s how you get your Photon setup with Windows using PuTTY.
From here, you can deploy your own app to your Photon or try building my “Skype for Business Status Light”
Make on!
Jon